Modern half-square triangle baby quilt
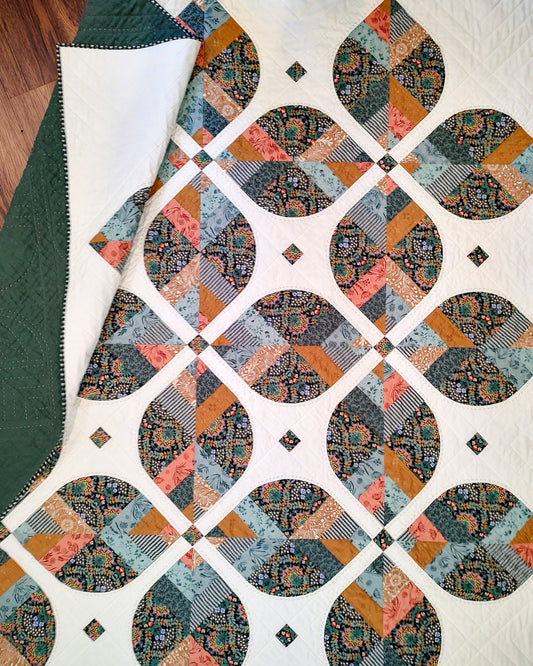
We get asked often for a pattern for this little half-square triangle (HST) baby quilt, and as much as we love it too, it just didn't warrant a fully featured pattern. We still want to make it available so here it is in a quick and easy tutorial version with lots of pictures and details! We highly recommend this as a project for those who are looking to knock out a baby shower gift in a day.
Tutorial assumes reader has knowledge of basic skills, including assembling blocks into a quilt top, basting, quilting, and binding your completed quilt.
Finished size: 32" x 52"
Fabric requirements:
- 40 5" squares. This can come from: a charm pack (42 5" squares), a junior layer cake (20 10" squares), 5 quarter-yard cuts, or 4 fat quarters. Or raid your scrap bin!
- 1 yard of background fabric. You will need 33" out of the 36" so cut carefully.
- 1.5 - 2 yards of backing fabric. Depending on your comfort level or quilter's requirements. I used 1.5 yards and it was a tight fit, but I quilted it at home and was ok with it.
- 1 package crib size batting 45" x 60", or batting cut to size.
Cutting Instructions:
- Sub-cut your main prints if necessary into 5" squares. Double check totals at the end to make sure you have 40 5" squares
- Cut 5 strips of background fabric 5" wide; sub-cut into 40 5" squares
- Cut 4 strips of background fabric 2" wide for borders; set aside
- Cut 4 strips of binding fabric 2 1/2" wide for binding; set aside
Piecing instructions:
1. Take each 5" print square and pair it with a 5" background square. Draw a line corner to corner along the diagonal. Sew ¼” on each side of the line.


2. Arrange all the HSTs in an expanding diamond pattern. I usually start with the center diamond and work out from there. Some versions have the center diamond centered in the quilt while other versions have it off to one side or the top or bottom - feel free to be creative here!

3. Assemble the rows in your preferred method - this quilt is easy to chain piece! Press rows in opposite directions to nest seams in the next step for clean points and sharp corners.
4. Assemble the rows into a quilt top.
5. Find the borders strips you set aside and continue to adding borders.

These are our standard instructions for adding borders, finishing, and binding that you would find in our fully featured patterns:
Adding borders:
- Cut the amount of strips specified and cut off selvedges. Sew end to end with a 1/4” seam to make one long strip of fabric, pressing seams in any direction.
- To ensure a square quilt, measure the left, right, and center lengths of the quilt. Take the average of the three measurements – this is now the length of your side borders.
- Cut two pieces from your long strip of fabric this length and mark the center. Pin the left, right, and center first, then pin well along the entire edge.
- Sew a 1/4” seam and press towards the border. Repeat with the average of the top, middle, and bottom widths of your quilt. Repeat this process as necessary if you are attaching multiple borders.
Finishing:
Cut and piece (as needed) your backing so you have an extra 2-4” on each side. Layer and baste your backing, batting, and pieced top. Quilt as desired.

Binding:
Bind as you prefer - below are the instructions we include in our fully featured patterns and recommend for beginners.
- Cut the number of 2 1/2” binding strips specified and cut off selvedges. Sew end to end with a 1/4” seam, pressing seams open. Fold lengthwise, wrong sides together, and press well.
- Leaving a 5-6 inch tail at the beginning, sew the raw edge of the binding strip to the raw edge of the quilt with a 1/4” seam. Stop a quarter inch from the corner and backstitch. Cut thread and release the quilt.
- Fold the binding up, making a 45 degree fold in the corner. (See diagram) Keeping this fold in place, fold the binding back down again. Starting with a backstitch, continue attaching binding as before with a 1/4” seam. Repeat at each corner.
- Backstitch 5-6 inches from the starting point. Lay the tails on top of one another and trim with 1/2” overlap. Open the binding tails, sew ends together with a 1/4” seam, finger press the seam open, and re-fold. Lay the binding flat to the quilt and finish stitching down. Fold the binding over the raw quilt edge and stitch down as desired.


Take a look at some of the other versions we have made in the past:


Happy sewing!
Rebecca and Cait


